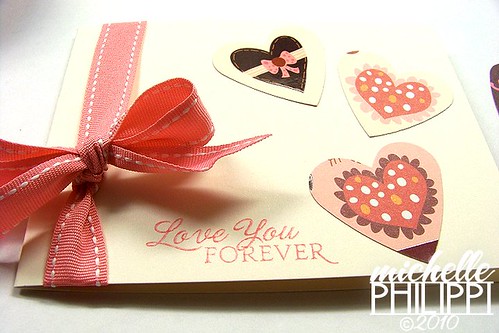
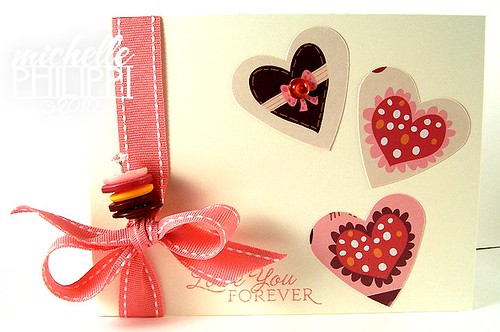
Love you forever.
Posted by Michelle on January 29th, 2010 . Filed under: Uncategorized .Happy Friday, Girls!
January is just tick-tick-ticking away and it’s totally crunch time for Valentine’s Day! So let’s get to it.
Today I’ve got a sweet little card I made for one of my kiddies – and a lil’ step-by-step because I think that kinda stuff is neat-o to see.
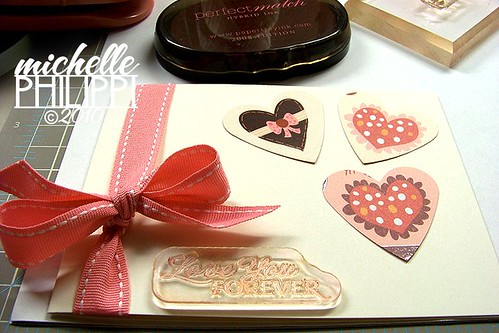
So I started with some more of this fun Sweet Cheri paper by Imaginisce and just punched some hearts out of it.
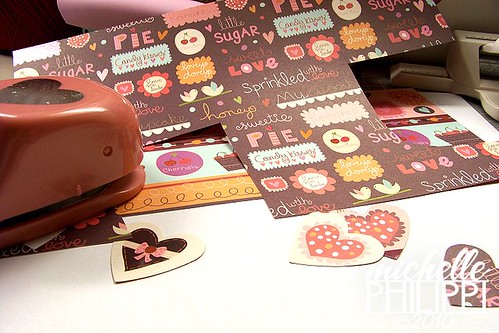
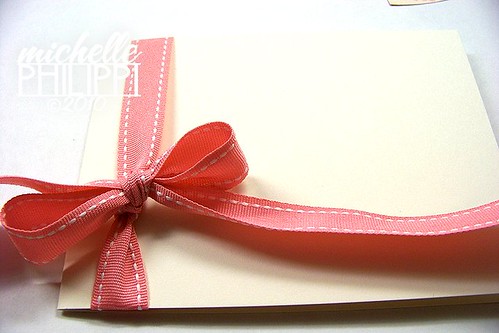
There are so many colors in this paper, dark too, so I decided to go with a light base of Vintage Cream from Papertrey Ink. And then placed my hearts here and there to see if something tickled my fancy.
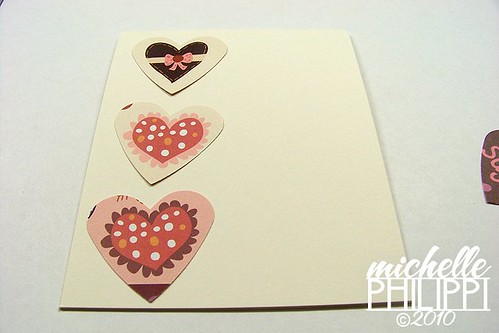

I opted for the hearts on the upper right because I didn’t know how I would incorporate ribbon with the hearts going down the front of the card. And I needs me some ribbon on my card, y’all!
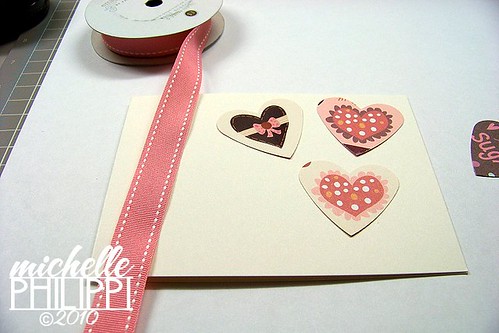
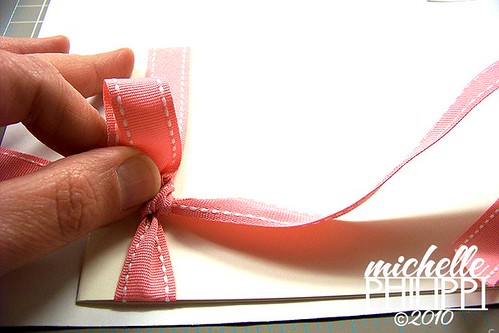
Then I tied my pretty Hibiscus Burst bow. Some people have asked me about how I get my bows to look the way they do – I have no secret. I tie a bow like tying my shoes. The only thing I can say is that some flimsier ribbons – though very pretty – are sometimes harder to get into the perfect bow so you have to play with them a lot…which is why I don’t use them too often because I don’t have that kind of patience *giggles*
So here’s the part where I get stuck. And it’s my own issue because of the way I create a card. But I sort of fancy a little challenge now and then so here we go: so now my bow is on, my hearts are on – what about a sentiment? That’s usually the last thing I decide on, what stamp and where to put it (kind of important details) – LOL I found the perfect spot, but I had to put the stamp at the top of the block to get it to stamp without the block knocking in to the ribbon and messing me up.
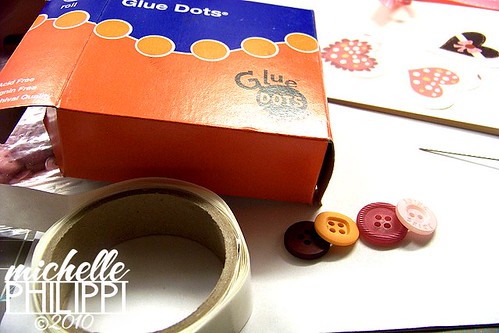
Now to embellish – with buttons, of course. And I thought I would show you my shameful way of storing buttons. I have this rolling cart with drawers and one of them is full of all my Papertrey button bags.
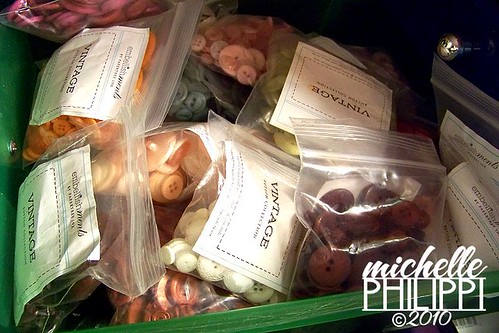
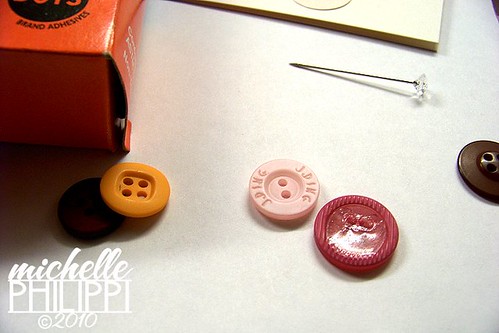
I pulled out the colors that matched the colors in my patterned paper: Dark Chocolate, Scarlet Jewel, Orange Zest, Raspberry Fizz and Sweet Blush. And you’ll notice I have a little Maya Road pin there. That’s because I saw this great button pin that Anabelle O’Malley made and I knew I had to try it.

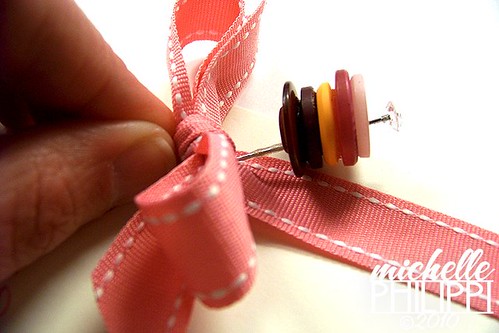
I placed my buttons in the color order I wanted, and then put a thin Glue Dot on the top of each (except the top one) and poked the needle down through all of them in a nice pretty stack.
I also wrapped a Glue Dot around the bottom of my pin for some extra stay in the ribbon. I actually cut some of the bottom of the pin off because it was too long and I didn’t want it hanging out too far down there with the sentiment.
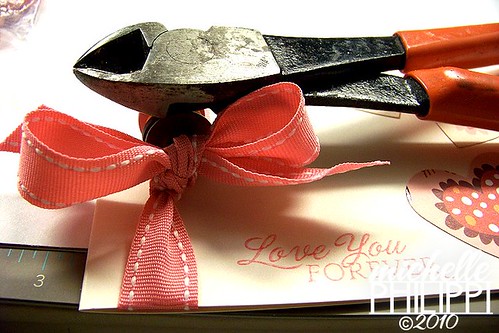
And then I put a little bit of Tombow Mono Multi behind the little button pin stack so that it would stay there and not flip flop around. I put pressure on it with my heavy wire cutter.
I added a little Dew Drop to the bow in one of my hearts just to have a lil’ dimension over on that side of the card – and there ya’ have it!
TGIF!


January 29th, 2010 at 7:25 am
Ooo, another step-by-step! I love getting that sneakie peek into the creative mind of Michelle! 🙂
This card is awesome! I love the button stack and the color combo is totally fun! 🙂
January 29th, 2010 at 8:18 am
I too love the colors on this! Such a simple yet very pretty card!!! Thanks for the step by step : )
January 29th, 2010 at 8:33 am
LOL @ you having to have ribbon… whoo I know the feeling. 🙂 Love the stacked buttons… and I think I need to acquire some of that hibiscus burst saddlestitch. 🙂 Love it… LOVE the cream. 🙂
January 29th, 2010 at 9:18 am
I want your drawer full of buttons. I am loving these posts. You have me itching to buy more stuff. Maybe that's not a good thing. I'm sure I could look and find out, but what set is that sentiment from? And I love your finished result. Nicely done!!!
January 29th, 2010 at 1:54 pm
Oh this is so CUTE! I liked what you did with stacking the buttons on a pin. Great idea.
January 30th, 2010 at 12:44 am
What a process! Always appreciative of the end result though. Cute idea w/the buttons.
January 30th, 2010 at 10:09 am
Lovely card! and thanks for the step-by-step!
January 30th, 2010 at 5:02 pm
Cute card, and how cool to see your creative process, thanks for sharing!
January 30th, 2010 at 6:55 pm
love the stacked buttons…great card…the kiddie will love it!